Tuesday, August 6, 2013

Executive Producing a Brewery Video

Here's a link to episode 5 in the reality web series 'Off Season' by Generate L.A. for MSN - the story of mixed martial arts fighter Mike Pyle working for a day at Bootlegger's Brewery - a career move he has an interest in after someday retiring from the ring: ‪http://binged.it/12YAu2D‬
MMA fighter Mike Pyle visits Bootlegger's Brewery.
While the episode is not exactly about home brewing, it does give a very basic overview of a commercial scale brew process. MIll the malt, steep the mash, boil the wort, add hops, ferment, serve. The folks at Generate made a story that is quite fun.

My part as MSN's Executive Producer in the project is one of being a guide to the Producer and Editor in post. They create a rough cut edit which I review and gather comments on from trusted eyes on my team. Together we add and remove bits that help fit the whole story into a target three minute length, hoping the finished product will be the best possible telling in a short amount of time.

Saturday, May 18, 2013

Pilsner lager fermentation temperature control

Autumn, Winter, and Spring in the Pacific Northwest are pretty much one season: the season for making lagers in your garage. Daytime temperatures usually range from 40 ºF to 50 ºF, and lows are not much lower. This range is perfect for fermenting lagers with just a heat blanket and temperature controller to ward off the chill. And if the rare day of warmer temperatures arrives, a couple of ice packs around the carboy will keep the beer from overheating.

Eventually, at least most years, the tilt of the Earth begins to bring more of the sun's warmth back to a more Ale friendly temperature range - into the 60s and 70s ºF. During this brief time of year (some call it summer), cooling to lager fermenting temperatures with ice packs becomes impractical. The easier way to keep lager yeasts happy is to move them to a chest freezer.

Example: A German Organic Pilsner based on Jamil's Myburger recipe
Amazingly flavorful German malt ready for an Organic Pilsner.
You've chilled to 70 ºF and racked your gyle off any residual hops from the kettle boil. You've further chilled the gyle to 40 ºF in your chest freezer and racked off of the precipitated cold break material into a 6.5 gallon primary fermenter. You've oxygenated the gyle for sixty seconds and pitched the decanted three liter stir plated yeast starter. Now you need to control the temperature for an ideal fermentation.
A whopping-big 3L yeast starter starts to boil, er, double boil.
Start by wrapping the 6.5 gallon carboy in a heating jacket. (I use a luggage strap to hold the jacket in place around the fermenter.) And since there is likely to be a lot of yeast activity at the start of fermentation, I plug the carboy with my modified 1" blow off tube drilled to hold a thermowell.
Blow-off tube drilled for a thermowell.
Now you can use two temperature controllers to regulate heating and cooling. Put one probe into your chest freezer (set to smallest amount of cooling) and set it's controller to cool within one degree of 40 ºF. Put the other probe into the drill modified thermowell, plug the heat jacket to its controller, and set to heat within one degree of 40 ºF. Over the first 48 hours of fermentation work the temperatures gradually up to 50 degrees. Then you can hold heating and cooling to right around 50 degrees till fermentation subsides. Diacetyl rest - same thing - raise both controllers to 68 ºF for a couple of days, then drop back to 50 ºF to finish.
Dueling temperature controllers - 40 ºF warming on left, 40 º cooling on right.
For the lagering stage take away the heat jacket and warming controller. Put the cooling controller's probe into the fermenter's airlock thermowell and dial down the freezer temperature to 32 ºF in no more than 4 ºF per day increments.

Friday, May 3, 2013

Home brew better beer

I have taken a year and a quarter off from blogging about making beer. During that time, I  have "obsessed", as my wife, with exaggerated flourishes, would describe, on actually making beer. There are things I have tried that have worked brilliantly, and there have been failures. Here are some of the things I have learned. . . 

  1. Take notes. Today I brewed the second version of a successful AleSmith IPA clone from last fall. As I read my notes, I thought to myself, "I don't remember doing that step. Did I really let the hops steep an additional 15 minutes after flameout?" Your notes will guide you as you refine your recipes.
  2. Get a good brewing software if you have a computer. I use BeerSmith - mainly because it runs on MacOS, and has a light version for IPhone. But there are plenty of others. I have also gotten some good, reliable recipes from Northern Brewer on the IBrewmaster app for IPhone.
  3. Learn from the masters. Jamil is pretty much a first name kind of celebrity in home brewing circles, and for good reason. His book, Brewing Classic Styles, by Jamil Zainasheff - co-written with John Palmer, has detailed and insightful instructions for pretty much every beer style out there today. And the Brewing Network also has the Jamil Show podcasts archived for download, where Jamil and John Plise go into even more detail about technique. These are great for listening to during your daily commute.
  4. Experiment so you can learn from your mistakes. I went through a period where I thought it would be a good idea to reduce down the third runnings from my mash for better efficiency. Most of the results were unpalatable batches of beer with over-the-top caramel flavors from the resulting Maillard reactions due to excessive boiling. In small doses, this technique can work for a Scottish 70/-, but it is the wrong thing to do with just about every other kind of beer.
  5. Exercise proper sanitization techniques, but understand when going overboard accomplishes nothing. Bacteria, wild yeasts, and just plain dirt are in the air all around us. But they tend to fall down of their own accord. A healthy pitch of yeast in a clean environment will go to battle against anything that attempts to take hold in their habitat.
  6. Control temperatures carefully from the mash through fermentation to bottling or kegging. As the truism goes, "Brewers make wort. Yeast makes beer."

Monday, January 16, 2012

Pliny Clone Dry-Hop

6.75 oz whole Columbus, Centennial, and Simcoe hops loaded through a paper funnel into the secondary.
Auto-syphon ready for racking from primary.
Auto-syphon ready for racking to secondary.
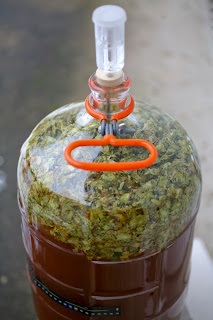
5.25 gallons of double IPA begins to dry hop.
Secondary fermentation begins with probe inside thermowell and heating blanket plugged to temperature controller. 
50 lbs of Organic Gambrinus Pilsner malt waits for the next batch to begin.

Wednesday, January 11, 2012

Stir Plates for Yeast Starters

Michigander Dan Jeska's Stir Starter for boosting yeast procreation.

Once you have precise control of the grain crush through a homebrew mill, the next gadget to think about is a stir plate. Actually, now that I have used a stir plate on just one batch, I wish I had bought or made one at the very beginning of my brewing hobby. The yeast on my current batch, a double IPA, were the happiest of any I've worked with. Within ten hours of pitching, the CO2 foam in my 6.5 gallon carboy was a 4" thick white mouse. I dialed the ambient temperature down to 58 ºF for the first 36 hours, until the initial activity seemed to slow, then raised the temp to 68 ºF for the remainder. The temperature rise gave way to still more vigorous fermentation activity, practically reaching the vessel's blow-off tube.

Most bigger homebrew supply web sites offer at least one, and maybe a couple of stir plates. Typical examples are the Fermtap Magnetic Stir Plate from More Beer ($69.95 shipping included), and the Northern Brewer Stir Plate ($79.95 plus $7.99 shipping). I chose the Stir Starter Stir Plate ($42 shipping included), not just because the price was very competitive, but mainly because the designer, Dan Jeska, solved the problem of losing the Teflon coated rotator bar into the fermenter at pitching time. He includes a second small "keeper" magnet in the kit which you use to stick to the bar magnetically through the bottom of the starter flask. This keeps the stir bar from pitching right along with the yeast. During the starter growth phase, you can kept the stir plate and flask wrapped in towels, set into a decent sized kettle to stabilize the rig, or to allow for easy relocation if needed.


Dan links to a must-read article by M. B. Raines-Casselman, "Yeast Propagation and Maintenance: Principles and Practices". Raines-Casselman has some insightful techniques for optimizing a yeast starter, and explains how starter wort needs to be treated differently than the final batch of beer. Your basic goal with a starter is to make it possible for the yeast to expend most of their procreation energy in the starter. You want to keep oxygen flowing in with a loose tinfoil seal over the flask, which is maybe a little counter-intuitive to the rest of the fermenting process. The stir plate's vortex continually draws in oxygen that the yeast needs for creating more yeast. Alternately, you could use a rubber stopper, but attach a sanitary filter to it instead of an airlock. Then, when you pitch the yeast into the final wort, they are healthy and plentiful enough to immediately start the desired activity of full fermentation.


Monday, December 26, 2011

Milling Grain for Home Brewing

My first home-milled malted barley. (I feel like a proud parent!)
Now that I have grown accustomed to all-grain brewing, it was only a matter of time before I bought a grain mill. I had mail ordered a kit where I suspect my mash efficiency was diminished by a bad milling. I had seen my local homebrew shop's hand-drill powered mill sometimes work, sometimes not. And a couple of weeks ago I found a great online shop in Portland, F.H. Steinbart Company, who free-ship organic grains to Washington State. But, since they don't offer milling of their organic Gambrinus Pilsner malt, Santa decided to bring me a mill this year.

My Crankandstein 3D homebrewing mill with hopper and platform.
The consensus among homebrew authors, forum contributors, YouTube video bloggers, and product web sites, is that the best milling comes from opening the barley's husk without shredding, then cracking/smashing the inner meat; not making a lot of powder, and not leaving a lot of un-crushed large pieces. Historically, the mill that had the overall best reviews was the Phil Mill, a small hand-cranked single roller & curved plate combination, which, sadly is no longer manufactured. Food processors, blenders, and rolling pins get universally poor reviews. There are a lot of two-roller systems on the market, starting at around $100: Millar's Barley Mill, Schmidling MaltMill, the Cereal Killer Grain Mill, and the Barley Crusher Malt Mill. There are even designs for build-your-own systems like the Beerbarian Malt Mill.

I found more advanced three-roller designs from Monster Brewing Hardware, and Crankandstein to have the most thought-out approach to milling grains for homebrewing. (I chose the Crankandstein for it's sturdy and beautiful design, and for the killer hopper made from what looks like a galvanized poultry watering tank.) The beauty of the three-roller design is that the top two rollers are factory set at .070" uniform spacing, perfect for pressing open the husks and softening the whole grains. The bottom roller is adjustable by .005" spacings so the second pass pulverizes the grain starch, but leaves the split husks whole. With the right adjustments, you get what should be a perfect, and consistent mash.

My eight gallon mash tun/boil kettle at capacity.
Having achieved a perfect crush, a roomier mash tun is next on my wish list. If I plan to brew higher gravity recipes I'll need to either scale up my mashes or scale down my batches.


Wednesday, November 30, 2011

5 Gallon Used Bourbon Barrels

Freshly dumped bourbon barrels from Woodinville Whiskey Co.
My local Washington bourbon distillery has the perfect thing for adding bourbon barrel aged goodness to your next 5 gallon batch of beer. Here's the text from their website:

"All of our barrels have been used for just one aging cycle of our bourbon whiskey. This single use provides the oak with a rich bourbon flavor while still maintaining plenty of oak extracts for future use. The smaller barrel sizes also provide a greater surface area to volume ratio (more wood in contact with liquid) which results in increased extraction. The barrels can be used for aging beers, cocktails, bitters, sauces, or whatever you can dream up!"
5 GALLON USED BOURBON BARREL
$120